Sunset Terrace Photography Checklist: 12 Shots to Capture Before the Light Fades
Sunset on a terrace lasts about as long as a good espresso, and it goes cold just as fast. The light you came for arrives, does something remarkable for eight or ten minutes, then excuses itself. Photographs made in that window either look like everyone else's or like they were made by someone who was paying attention.
This checklist is the second kind. Twelve frames, worked through in order, moving from the wide view down to the smallest detail on the table. Nothing here needs a studio, a second lens, or a permit. A phone with manual controls will do, and a camera with one prime will do it slightly better.
Five Minutes of Prep That Save the Whole Evening
Walk the terrace before the light starts to matter. Find where the sun will actually sit, which is rarely where you assumed from the street. Note the lamp posts, the parasols, the air-conditioning unit, the chair that will end up in your frame. Pick two positions you can move between quickly once the colour starts, because nobody wants to watch you wander at peak light.
Then set the camera up so you never touch a menu again:
- Format: RAW if you have it. The gap between sky and terrace is wide, and RAW gives you room to pull it apart later.
- White balance: fixed to daylight. Auto white balance will neutralise the exact warmth you came for.
- Exposure: start at minus two-thirds of a stop when the sun is in frame, and go to minus one and a half for silhouettes. Dark foregrounds can be lifted; blown skies cannot be recovered.
- Aperture: around f/8 for wide views, f/2 to f/4 for table details.
- Bracketing: three frames at even, one under, one over. Cheap insurance, useful later.
Clean the front element with your shirt if you have to. A fingerprint that is invisible at noon turns into a pale smear across the sun.
Shots 1–4: The Wide View and the Room Around You
1. The arriving wide
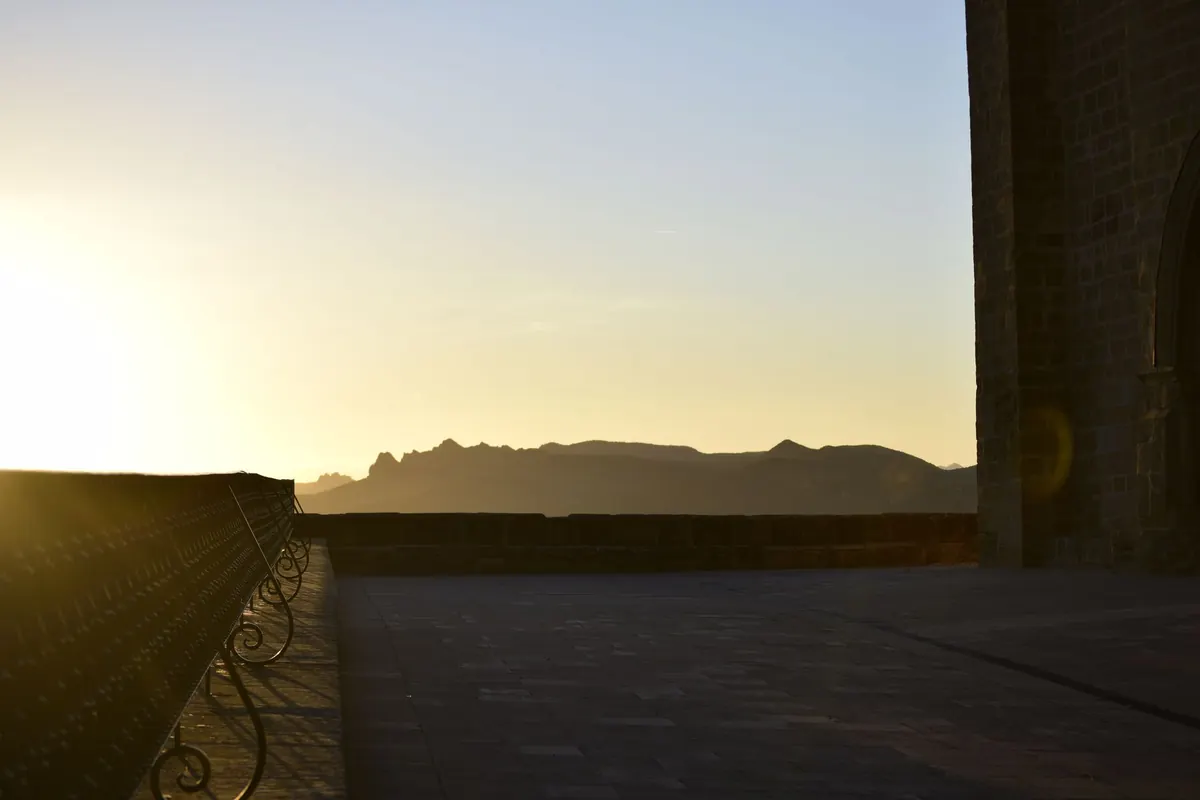
Stand at the edge or in a back corner with the widest lens you have. Put the railing along the lower third and give the sky two-thirds of the frame. Level the horizon using the grid; a tilted sea line is the one mistake no editing fixes gracefully. Take one frame at chest height, then drop to knee height. From low down the railing becomes a diagonal that pulls the eye toward the sun.
2. The view from your chair
Sit exactly where a guest would sit. Elbows on the table, camera at eye level, and include something close — a glass, a candle, the corner of a menu — to give the frame depth. This is the photograph that sells the place a year later: the view, but with evidence that someone was sitting in it.
3. Along the railing
Get close to the railing and shoot down its length, straight into the light. The rail recedes as a line and the terrace falls away on one side. Stop down to f/11 and the sun will break into a small star. Flare is fine here; if it eats the frame, shade the lens with your hand and shoot again.
4. Wide, with people for scale
Back up until diners appear at the edges of the frame, small and incidental. Wait for a waiter to cross the gap between tables. A figure at one-twentieth of the frame height tells the viewer how big the view actually is, which no landscape shot can do alone.
Shots 5–8: Table Details and the Small Evidence
5. The glass against the sky
Place a glass so the sunset sits inside the bowl, and expose for the sky. The rim will go dark and the wine will glow. Move the glass rather than the camera; an inch to the left often fixes everything. Fill at least half the frame with sky so the colour reads.
6. The overhead table
Stand, look down, keep the camera flat and parallel to the table. Plate, glass, hands, cutlery. The real subject is the shadow: late light throws long ones across the cloth, and they are the most underused free ingredient on any terrace. Set the glass so its shadow runs toward the far corner of the frame instead of out of it.
7. Hands and the toast
Work from across the table with a short telephoto or a 2x phone zoom, wide open, focused on the rim or the knuckles. Shoot in bursts. A toast lasts about a second and a half, and the good frame is usually the one just before the glasses touch. Backlit hands pick up a bright edge that reads beautifully against a dim terrace.
8. Small evidence
Salt cellar, torn bread, a folded napkin, keys dropped on the cloth, the corner of a menu. Close focus, shallow depth. These frames give an edit its rhythm — without two or three of them, twelve sunsets in a row start to feel like a slideshow of the same minute.
Shots 9–11: Silhouettes and Reflections
9. Two figures at the railing
Expose for the sky and let the people go black; that is the point, not a failure. If your camera has spot metering, meter the brightest part of the sky and then pull exposure down another half stop. Shoot from low enough that heads clear the top rail, and try to leave a sliver of sky between two heads rather than merging them into one shape.
10. One figure, small
The same idea at the opposite scale. Wide frame, a single person tiny at the railing, placed on a third. This is the quiet frame in the set, and it is usually the one people stop on.
11. The reflection
Wine, sunglasses, a polished tabletop, wet stone after a shower, the window behind the bar. Lower the camera until it is almost level with the reflective surface — the flatter the angle, the longer and stranger the reflection becomes. A polarising filter lets you decide how much of it to keep, but on glass the angle does more work than the filter ever will.
If the sky is spectacular, look at what is underneath it. If the sky is grey, look at what the light is doing to the glass.
Shot 12: The Afterglow, and How to Stay for It
Most people leave at the wrong moment. Fifteen to twenty-five minutes after the sun disappears, the sky turns from orange to rose to a deep violet-blue, and the terrace lamps come on while there is still colour behind them. That warm-cool mix is the shot, and almost nobody is standing there to take it.
Go back to the exact position of shot one and repeat the frame. You will end up with a pair that works as a before-and-after. Brace the camera on the railing or use a small tripod, drop the shutter to between 1/15 and one second, and let the ISO climb to 800 or 1600 if you must — a slightly grainy afterglow beats a sharp black frame. Use the two-second timer so your hand does not shake the rail.
Shoot as the lamps switch on, one at a time if you are lucky. Keep going until the brightness of the terrace and the brightness of the sky roughly match; that balance point is the last useful frame of the evening.
After the Colour Goes: A Ten-Minute Routine
Do not spend the sunset reviewing pictures on the back of the camera. You can see them later; you cannot get the light back. Once the sky is properly dark, order something warm and run through this:
- Note the clock time of your best frame in your phone. Next visit, start there.
- Copy the card or the camera roll to a second place before you delete anything. Cull tomorrow, not tonight.
- When you edit, lift the shadows a little, keep the highlights warm rather than orange, and resist the saturation slider. The horizon stays level.
- Crop verticals to 4:5 for social use and keep one uncropped wide for the record.
Twelve frames, one terrace, one evening. If half of them work, you have a set. If two of them are the low railing shot and the afterglow repeat, you have the two you will still be showing people next year.
Photo: Xabi Oregi / Pexels